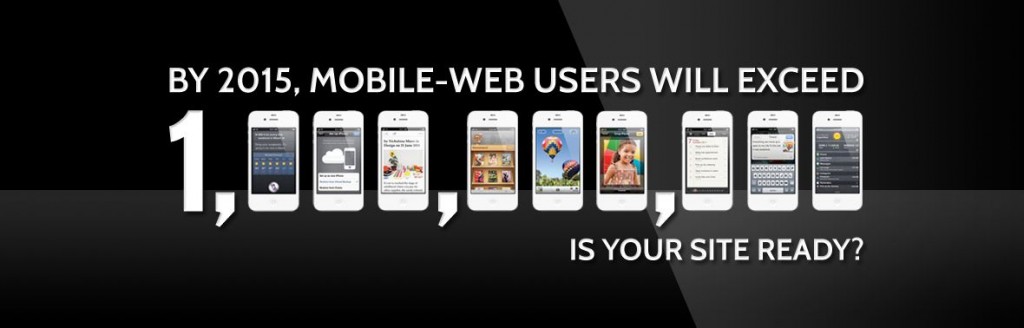
You are here:    Home  > Blog  

iOS 7 – An Operating System for Mobiles

iOS 7 is an operating system that is developed specially for mobiles. It is also known as the mobile operating system. It has been designed by the company called Apple. It is the seventh version of the original OS and was released on 18th September 2013.

Various new features have been added to this operating system. It can be easily downloaded on iPhone 4, iPad 2 and other new versions. Here mentioned are the changes or developments that they have made in their new operating system for mobiles:

  • In the earlier versions of iOS, you could not keep the track when a particular message was sent. In the new versions, there are timestamps for all the messages sent so that you can check just by swiping the bubble next to the message.
  • The Apple has come up with a totally new feature in regards to the ringtones. It does have new ringtones, but what stands out is the option where you can go and create your own vibration, called the custom alert rhythm.
  • All the iPhone users are well aware who Siri is. She is the personal assistant who helps the owner of the iPhone to find things online. In the new version, she has been upgraded and can help in finding images, latest news apart from the restaurants and cinema information as in earlier versions.
  • Another feature that has been added helps you to stay in touch with your friends much more easily. When you go in the Bookmarks menu, just click the @ symbol and in front of you will be all the tweets with links!
  • Nothing can better, when you get a chance to teach your assistant how to do things. In this case, it is about Siri. There have been times when a name has been a tongue twister for her and you have laughed over it and wondered if you could even tell her, how to pronounce. Well, what else your wish has been granted! Now, you can teach Siri, how to say a name or a word that is mispronounced by her and what else! She will remember.
  • iOS 7 has removed the restriction, the limit placed for how many applications could one have on your screen or not.
  • Downward swipe on your mobile home screen and you have the Spotlight search. You can search everything and anything apart from the web and Wikipedia, as this feature has been removed in the latest version. For that, the user will have to go to Safari.
  • Apart from many other features, this phone also adds the personal touch. Once you add your personal details on the mobile like the address, your birthday, reminders. Siri helps you to keep a track of time and details as asked. For example, picking up something from home, how much traffic will be there from home to office? Even you will be wished ‘happy birthday’ by the phone when the big day comes!

By: Vipin Jain

On Device Console for iOS Developers

iOS Application DeveloperXcode gives us a bunch of tools to keep the nasties at bay.
There are so many situations where you want to see same Xcode console log output while you are not actually debugging you application using Xcode.

Your tester reported one issue ( which is not easily reproducible ) . And you wanted to see the console output to resolve the issue.
You might have think lots of times :- ‘Wish i was able to see console output of application right their.

Lets make a control which will you show console output on device itself.

Resource:

There is a file in application directory which actually saves the every log output you see in Xcode console while debugging.
The smarter way is to simply read the file and show on device using some good user interface.

//
// AKSDeviceConsole.h
//
#import <Foundation/Foundation.h>
@interface AKSDeviceConsole : NSObject
+ (void)startService;
@end

//
// AKSDeviceConsole.m
//

#import “AKSDeviceConsole.h”
#import “AppDelegate.h”
#import <QuartzCore/QuartzCore.h>

#define AKS_LOG_FILE_PATH [[AKSDeviceConsole documentsDirectory] stringByAppendingPathComponent:@”ns.log”]
#define APPDELEGATE                                     ((AppDelegate *)[[UIApplication sharedApplication] delegate])

@interface AKSDeviceConsole () {
UITextView *textView;
}
@end

@implementation AKSDeviceConsole

+ (id)sharedInstance {
static id __sharedInstance;
static dispatch_once_t onceToken;
dispatch_once(&onceToken, ^{
__sharedInstance = [[AKSDeviceConsole alloc]init];
});
return __sharedInstance;
}

+ (NSMutableString *)documentsDirectory {
return [NSSearchPathForDirectoriesInDomains(NSDocumentDirectory, NSUserDomainMask, YES)objectAtIndex:0];
}

– (id)init {
if (self = [super init]) {
[self initialSetup];
}
return self;
}

– (void)initialSetup {
[self resetLogData];
[self addGestureRecogniser];
}

+ (void)startService {
double delayInSeconds = 0.1;
dispatch_time_t popTime = dispatch_time(DISPATCH_TIME_NOW, (int64_t)(delayInSeconds * NSEC_PER_SEC));
dispatch_after(popTime, dispatch_get_main_queue(), ^(void) {
[AKSDeviceConsole sharedInstance];
});
}

– (void)resetLogData {
[NSFileManager.defaultManager removeItemAtPath:AKS_LOG_FILE_PATH error:nil];
freopen([AKS_LOG_FILE_PATH fileSystemRepresentation], “a”, stderr);
}

– (void)addGestureRecogniser {
UISwipeGestureRecognizer *recogniser = [[UISwipeGestureRecognizer alloc]initWithTarget:self action:@selector(showConsole)];
[recogniser setDirection:UISwipeGestureRecognizerDirectionRight];
[APPDELEGATE.window addGestureRecognizer:recogniser];
}

– (void)showConsole {
if (textView == nil) {
CGRect bounds = [[UIScreen mainScreen] bounds];
CGRect viewRectTextView = CGRectMake(30, bounds.size.height – bounds.size.height / 3 – 60, bounds.size.width – 30, bounds.size.height / 3);

textView = [[UITextView alloc]initWithFrame:viewRectTextView];
[textView setBackgroundColor:[UIColor blackColor]];
[textView setFont:[UIFont systemFontOfSize:10]];
[textView setEditable:NO];
[textView setTextColor:[UIColor whiteColor]];
[[textView layer]setOpacity:0.6];

[APPDELEGATE.window addSubview:textView];
[APPDELEGATE.window bringSubviewToFront:textView];

UISwipeGestureRecognizer *recogniser = [[UISwipeGestureRecognizer alloc]initWithTarget:self action:@selector(hideWithAnimation)];
[recogniser setDirection:UISwipeGestureRecognizerDirectionLeft];
[textView addGestureRecognizer:recogniser];

[self moveThisViewTowardsLeftToRight:textView duration:0.30];
[self setUpToGetLogData];
[self scrollToLast];
}
}
– (void)hideWithAnimation {
[self moveThisViewTowardsLeft:textView duration:0.30];
dispatch_after(dispatch_time(DISPATCH_TIME_NOW, 0.5 * NSEC_PER_SEC), dispatch_get_main_queue(), ^{
[self hideConsole];
});
}
– (void)hideConsole {
[textView removeFromSuperview];
[NSNotificationCenter.defaultCenter removeObserver:self];
textView  = nil;
}
– (void)scrollToLast {
NSRange txtOutputRange;
txtOutputRange.location = textView.text.length;
txtOutputRange.length = 0;
textView.editable = YES;
[textView scrollRangeToVisible:txtOutputRange];
[textView setSelectedRange:txtOutputRange];
textView.editable = NO;
}
– (void)setUpToGetLogData {
NSFileHandle *fileHandle = [NSFileHandle fileHandleForReadingAtPath:AKS_LOG_FILE_PATH];
[NSNotificationCenter.defaultCenter addObserver:self selector:@selector(getData:) name:@”NSFileHandleReadCompletionNotification” object:fileHandle];
[fileHandle readInBackgroundAndNotify];
}
– (void)getData:(NSNotification *)notification {
NSData *data = notification.userInfo[NSFileHandleNotificationDataItem];
if (data.length) {
NSString *string = [NSString.alloc initWithData:data encoding:NSUTF8StringEncoding];
textView.editable = YES;
textView.text = [textView.text stringByAppendingString:string];
textView.editable = NO;
double delayInSeconds = 1.0;
dispatch_time_t popTime = dispatch_time(DISPATCH_TIME_NOW, (int64_t)(delayInSeconds * NSEC_PER_SEC));
dispatch_after(popTime, dispatch_get_main_queue(), ^(void) {
[self scrollToLast];
});
[notification.object readInBackgroundAndNotify];
}
else {
[self performSelector:@selector(refreshLog:) withObject:notification afterDelay:1.0];
}
}
– (void)refreshLog:(NSNotification *)notification {
[notification.object readInBackgroundAndNotify];
}
– (void)moveThisViewTowardsLeft:(UIView *)view duration:(float)dur; {
[UIView animateWithDuration:dur animations: ^{
[view setFrame:CGRectMake(view.frame.origin.x – [[UIScreen mainScreen]bounds].size.width, view.frame.origin.y, view.frame.size.width, view.frame.size.height)];
} completion: ^(BOOL finished) {}];
}
– (void)moveThisViewTowardsLeftToRight:(UIView *)view duration:(float)dur; {
CGRect original = [view frame];
[view setFrame:CGRectMake(view.frame.origin.x – [[UIScreen mainScreen]bounds].size.width, view.frame.origin.y, view.frame.size.width, view.frame.size.height)];
[UIView animateWithDuration:dur animations: ^{
[view setFrame:original];
} completion: ^(BOOL finished) {}];
}

@end

The above class is a complete control to show/hide on device console window on top of the application screen dynamically.
simply drop the above class in your project.

And initiate on device console like

– (BOOL)application:(UIApplication *)application didFinishLaunchingWithOptions:(NSDictionary *)launchOptions{
[AKSDeviceConsole startService];
return YES;
}

How to use show and hide console

Swipe left and right to hide and show the console

The Complete Demo Example Project is available here

On CocoaControls
https://www.cocoacontrols.com/controls/aksdeviceconsole

On Github
https://github.com/aryansbtloe/AksDeviceConsole

By: Vipin Jain

In App Billing For Android

In App Billing For Android

Google play was the first to introduce In App Billing for Android feature. This exciting feature helps you to put the digital content of your application into the market for sale. The users who use in-app billing will make income or profit through applications which are available free of cost. In app-billing can be referred as a place where you can find various income sources. With the discovery of this feature, the user is free to sell his application content whether it would be an audio file, video file or any other downloaded file or content.

There are two ways through which a user can sell products from his application:

  1. Standard (single billing)
  2. Subscriptions (bill generated for a definite interval of time)

In App Billing for Android is supported by Google Play and hence all the transactions details and check outs made by the user to buy or sell a product will be handled by the Google Play. There is no need for registration or any type of account to publish your application for in-app billing. Rather, you may require a developer console account in order to apply in In-App Billing for Android feature to your application. For the new users, there is an additional feature which helps and demonstrates the users by providing a trial application to launch their applications and sell the related products. The Android software development kit helps user to use all these tools in app billing.

In-app billing recently launched its version 3 which includes many new features which helped to make in-app billing a flexible and a powerful tool to host applications. Some of these features are as follows:

  • In new design, it will be easier for a user to write and maintain the application. User can easily detect the error and can debug it when required.
  • Before, many users used to write number of lines as a source code but in advanced feature codes is reduced as compared to earlier one.
  • In the earlier versions of in app billing, transactions made were lost frequently but now, robustness is added to the new version to avoid it.
  • Caching memory will be handled at a remote server so that rapid calls can be made for the application program interface. All the details about the product can be obtained. Any doubt related to the product can be cleared here. This will help the users and thus, they can get a better experience through in-app billing.

In the advanced version of In App Billing for Android billing, keys are managed on application basis. Earlier the developers were responsible for the keys. For every application, the service keys are different.

By: Vipin Jain

A New Technology: NFC (Near Field Communication) on Android

Android Near Field Communication

What is NFC?

NFC (Near Field Communication) on android is a standard based wireless connectivity appropriate for providing short range services. This technology is safe and also simple which provides two way communications. It is used mainly in the android mobile devices. The devices have to be at a distance of 10 centimeter for proper communication or data exchange. Near-field Communication Forum defined it which is a standard union of hardware, network-providers, banking, and companies of credit cards, software/application and others who take interest in the standardization and advancement of NFC.

How Does It Work?

It operates at the frequency of 13.56 mhz. and ranges from 106 Kbit/sec to 848 Kbit/sec. it requires an initiator and also a target. The initiator helps in generating RF field and a passive target is powered through it. Therefore, these targets take the forms of tags, cards and stickers as they hardly require power. Peer-to-peer interaction is also possible through NFC on android. Here, the devices should be powered. You must be thinking that wifi or Bluetooth perform the same task then what is the need of NFC?  The answer is less amount of bandwidth and shorter range is used by NFC. It is cheap, the targets are un-powered and you do not have to do the searching and pairing tasks. All you have to do is to tap it.

NFC Specifications:

There are many network related plans or packages which are provided by NFC on Android. Some of them are given below.

  1. Package for data format is known as NDEF or NFC Data Exchange Format. It includes data format for tags and devices.
  2. Package for record types which are used in the messages between tags/devices. They are known as RTD or NFC Record Type Definition.
  3. Library for posters with text, tags, audio or other type of data. It is known as Smart Poster RTD.
  4. Another NFC package known as java.nio exists. It includes certain buffers which are of some particular data type. When the end points are java based (android devices), this package makes the communication process easy and handy.
  5. The records having plain text use Text RTD package.
  6. The records having references related to any internet source uses URI or Uniform Resource Identifier.

The above explanation described the ways used by Android to handle the tags of NFC. Further, it also notifies the applications which ever is relevant to the application. Therefore, it can be said that NFC on Android is the standard which is used by the smart phones and other mobile devices to make the radio communication possible. You have to get the phones closer to each other.

By: Vipin Jain

iOS 7 Beta 3 – Few Considerable Changes

The latest improved iteration of Apple’s mobile software, iOS 7 Beta 3 was released in the first week of July in 2013. As we talk about the past betas like beta1 and 2, these were not well equipped with the best features and modifications. But the new beta 3 is comprised of the improved fluidity and stability.

There is a big list of the changes that are in the new apple software. Most of the changes of this list are some small alterations in the user interface so that the user may get the best and can have more enjoyable experience. But this change is not valued to be the solid change as the operating system of it is as it is. It can be said that there are a few considerable changes in the iOS 7 Beta 3 and there are a number of videos available to inform users about the changes.

Some of the changes made are mentioned below:

  • A new app animation may be experienced when you will download an app for instance you may see the new animation when you will access the spotlight search.
  • The dictionary within the iOS is also working once again.
  • You may also see the re-addition of the time that will be visible on the lock screen as well as on the Music app while you are playing the music.
  • Change in the style, color, texture and icons of the app.

There are more changes that you may experience other than that are mentioned above. So, visit any good website and get all this on your own iPhone.

You may notice that stability of the operating system is same as it was in beta 2. With the release of betas Apple is now attempting and fixing the various issues and bugs that were reported by the people. That’s why the user experience with this technology is also improving continuously. iOS 7 Beta 3 is accepted as the most reliable and great responsive as compared to beta 2.

Soon the beta 4 will get released for iOS 7 but its date has not arrived till yet. You may download the stable and the polished version of beta 7 from a number of good websites. The registered iOS application developer can access and download the latest version of beta 3. The one who have already installed iOS 7 may get upgrade by making setting in his iDevice. The unregistered users may pay for this version and enjoy the changes.

So, for what you are waiting for? Find out a reliable source and get known to all the changes that may prove to be very useful to you.